Development
Part 1 // Manhole Monsters: An Introduction to Augmented Reality in iOS
Apple's iOS adds new capabilities with every version, some superficial, others that go deep under the hood. At Substantial, Developers have made a habit over the years of creating "problems" that require us to dive into these new features.

Recently, our Head of Games & Development Director, Mike Judge, brainstormed Manhole Monsters: a game that used the camera to find manholes in the real world and then generated animated monsters coming out of them. It’s sort of like the classic game Pokémon Snap...combined with civic infrastructure.
While simple to describe in text, this problem required 3D simulation and rendering (to show monsters), computer vision and machine learning (to identify manholes), and an app to contain it all. To tackle this challenge required investigating the following frameworks, all of which are built into iOS (meaning anyone with an iOS automatically has access to them):
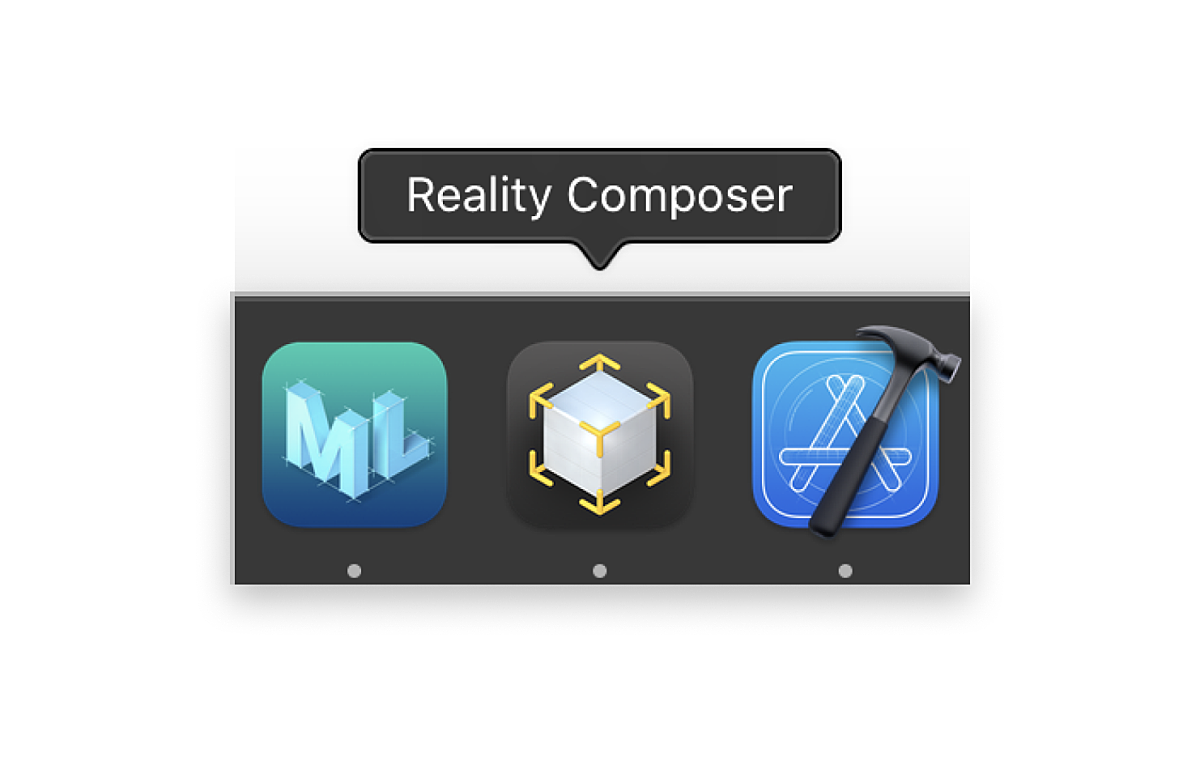
Create ML: a framework utilizing familiar tools like Swift and macOS playgrounds to create and train custom machine learning (ML) models on your Mac. Basically just a GUI around Apple's turicreate project.
Core ML: a framework for integrating custom models into iOS apps.
Vision: a higher-level ML framework that provides utilities for working with computer vision tasks, including feeding images and video into custom ML models. Uses Core ML under the hood.
RealityKit: a framework to implement high-performance 3D simulation and rendering. RealityKit leverages information provided by the ARKit framework to seamlessly integrate virtual objects into the real world.
SwiftUI: A new (iOS 13+) declarative framework for building app views, controls, and layout
In breaking down the game, we decided to tackle it in the following order:
Training - Create a model to recognize a manhole
Prediction/Inference - Confirm the model is correctly finding manholes in real life
Placement- The monster goes on the manhole
Building a UI - Wrapping everything together as an app people can use
Accessibility - Make our app even better by making it usable by more people
None of those steps is trivial, but how far could we take a prototype to see how such an app would be made? Things get a bit technical from here, so we’ll be splitting this up to talk about the machine learning side of things in this post, and in the next post we’ll talk more about how we put that model into practice.
Object Recognition - Training (Create ML)
Previously we mentioned a whole host of iOS frameworks we’d utilize to build a prototype app to do realtime ML for computer vision, in an attempt to add 3D animations on top of specific real-world objects. So, let’s dive right into it.
The first task we had to tackle was object recognition, or identifying those objects in a camera feed. This is a classic computer vision task, with a bunch of different approaches, but Apple has a bunch of built-in ML models for computer vision that accomplish a variety of amazing tasks: identifying hand and human body poses, text identification and recognition, trajectory detection of flying objects, and horizon detection, for example. Or, you can train and deploy your own machine learning models, which is the route we needed to go. Crazier still, with the dedicated Neural Engine built into iPhones 8 and later (which is basically a GPU-like module for ML tasks), you can run all kinds of complex tasks in real-time on the camera feed.
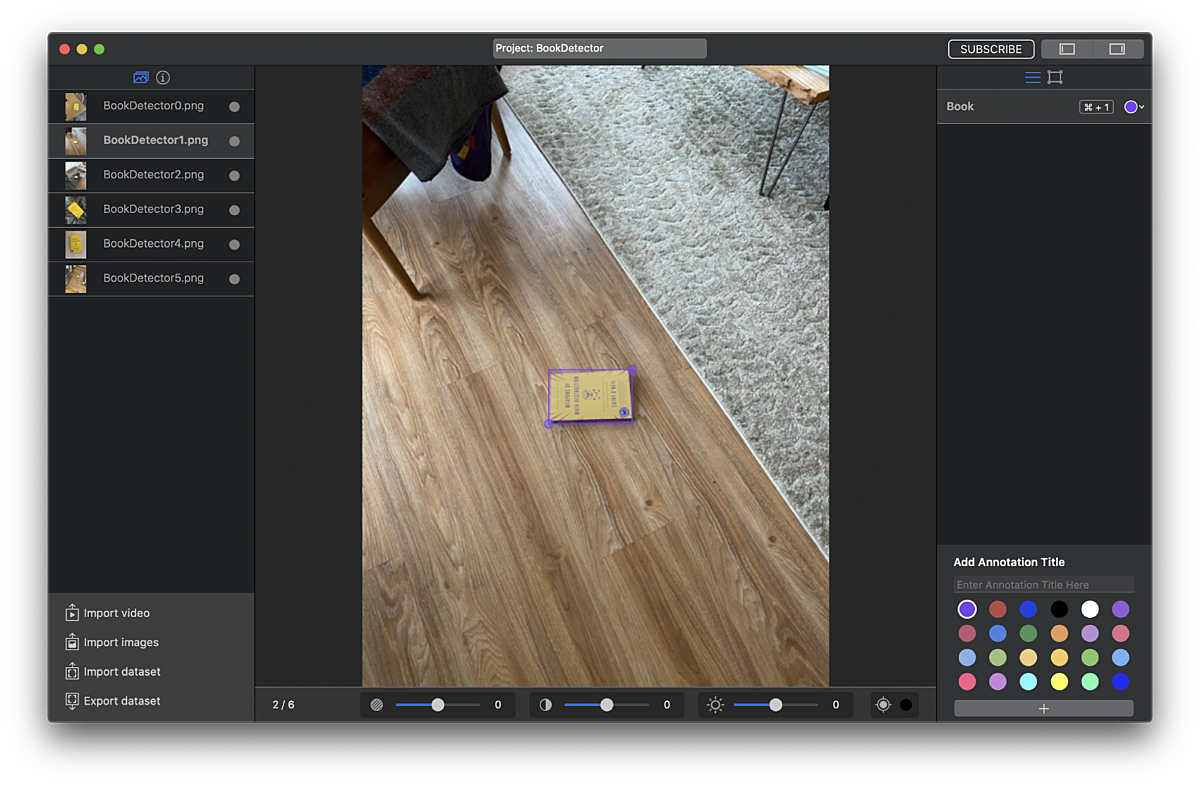
Since we didn’t have a Lightning cable long enough to debug and build our app to recognize manholes outside in the first iteration, we pivoted a little and switched to a more indoor-friendly (and drier) prototype: recognizing Weapons of Math Destruction by Cathy O'Neil, which happened to be our most recent Substantial-wide book club read. The book cover is very unique and was easy to place around our apartments for testing purposes. Try to do that with a manhole.
For training our custom object detection model, we first had to generate some labeled data because object recognition models require bounding boxes to be drawn around the object. We collected a fairly small number of images from our apartments and manually labeled them using MakeML. There seem to be a ton of software solutions for this, but MakeML was nice because it let us export the bounding boxes JSON metadata and training images into a format that Create ML could easily utilize. The object recognition unfortunately doesn’t benefit from data augmentation (which lets you train really robust models with little data), so we had to manually label all of our training data. We tried to see how well the model would perform with just a tiny dataset of 8 images.
Something important to note when generating your own models, especially for the purpose of something like identifying hand and human body poses is: there will inevitably be a bias within your data. If you are a thin, white man and you use photos of your own hand/body/etc to populate your dataset, your model’s object recognition behaviors will not result in the same experience for a user with darker skin, and/or a differently shaped body. It’s absolutely imperative to be cognizant of the biases that may be created within your models and how they may lead to (hopefully unintentional) harmful consequences.
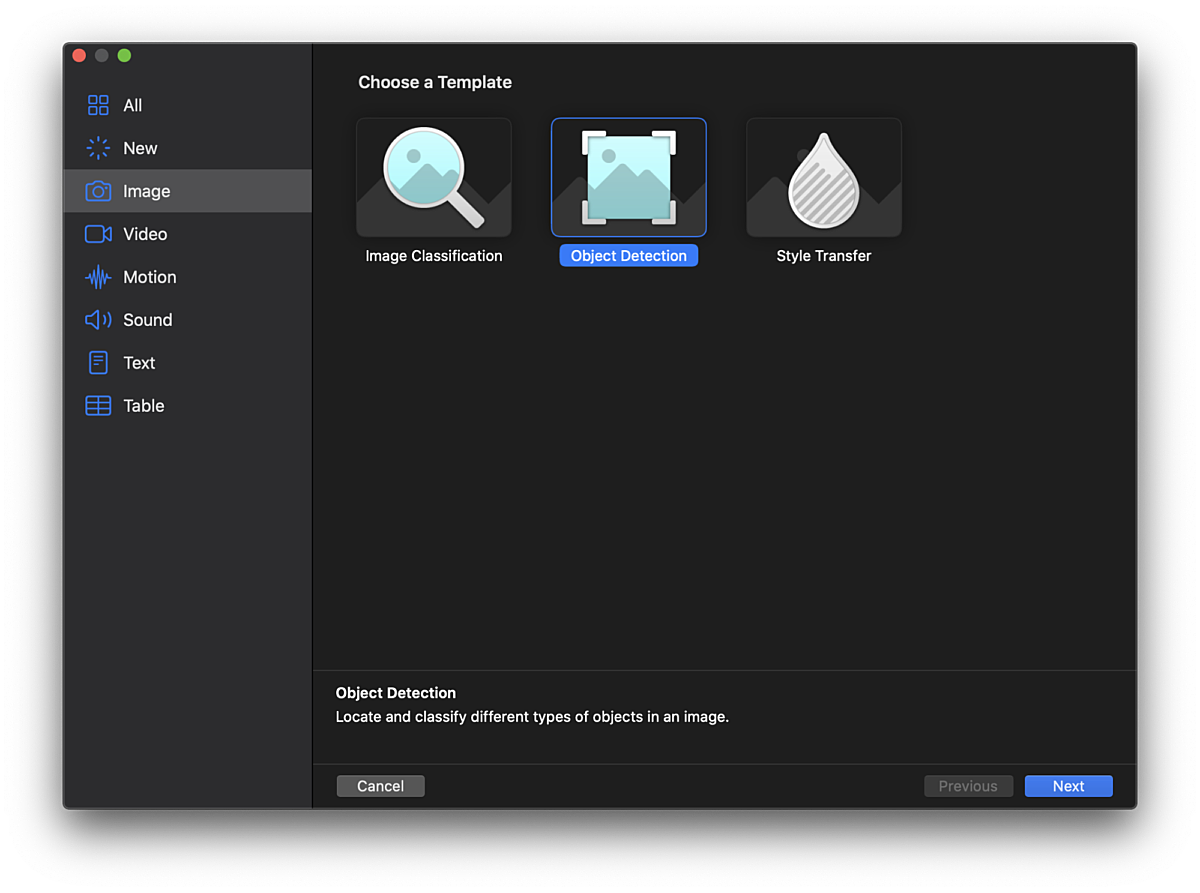
Next, we got to the actual process of training our model. We decided to check out Create ML, which is an app published by Apple for training custom ML models. The app supports an ever-growing list of tasks (e.g., sound classification, recommendation engines, image style transfer). For object recognition, the network is based on the YOLOv2 architecture, a network that lets you both identify and classify thousands of objects in real-time. Check out the insane demo of the network running on an action scene from Skyfall. Our model was obviously more simplistic, having only one class of objects (i.e., the book) to identify.
We dropped our dataset into Create ML and hit play and watched the overall loss (basically how the amount of total error of our model) nicely drop down and plateau, following an expected trajectory. We didn’t have a strong sense of what a good target loss would be for the model, so decided to forge ahead and get our model integrated into our app.
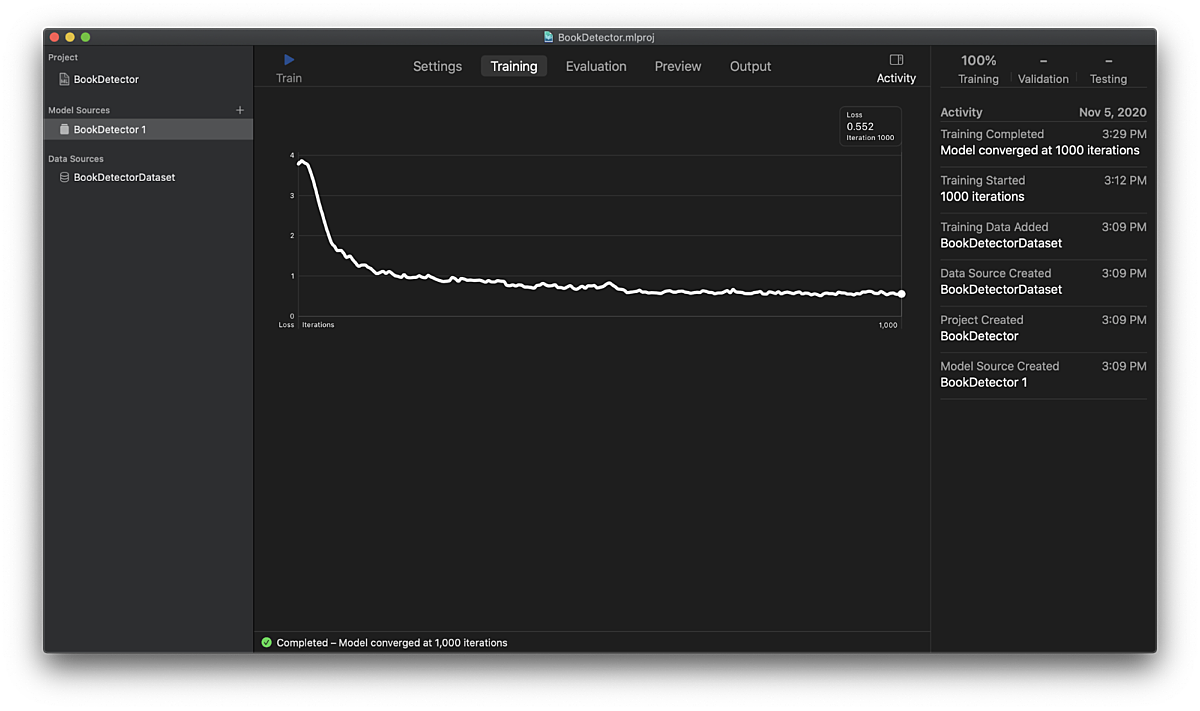
One cool thing that Create ML does is that it preprocesses the images for us, no need to worry about image dimensions. Overall, though, using Create ML was not a great user experience. We couldn’t get Object Recognition to work on macOS 11 Big Sur, which promised to use Transfer Learning to really speed up the training time of the model. Instead, we trained in macOS 10, which involved training the full YOLOv2 network from scratch using the CPU, which basically made our computers unusable for twelve-hour stretches at a time.
If we were tackling this as more of an ML challenge, rather than using ML as just an enabling component in our project, we definitely would have trained the network in the cloud using Google Colab and Keras. That approach would give us significantly more flexibility in optimizing our model and input data size, understanding whether our model was overfitting or underfitting, and experimenting with hyperparameters. Also, training would be much, much faster, as we’d get the enormous benefit of using Google’s tensor processing units (TPUs). On top of that, we’d still be able to utilize Transfer Learning in Keras to benefit from the massive amount of research and training data that has gone into the YOLOv2 network.
Object Recognition - Prediction (Vision + Core ML)
Once we had our model trained, it was super simple to drop in the model (BookDetector.mlmodel) directly into our Xcode project and start using it.
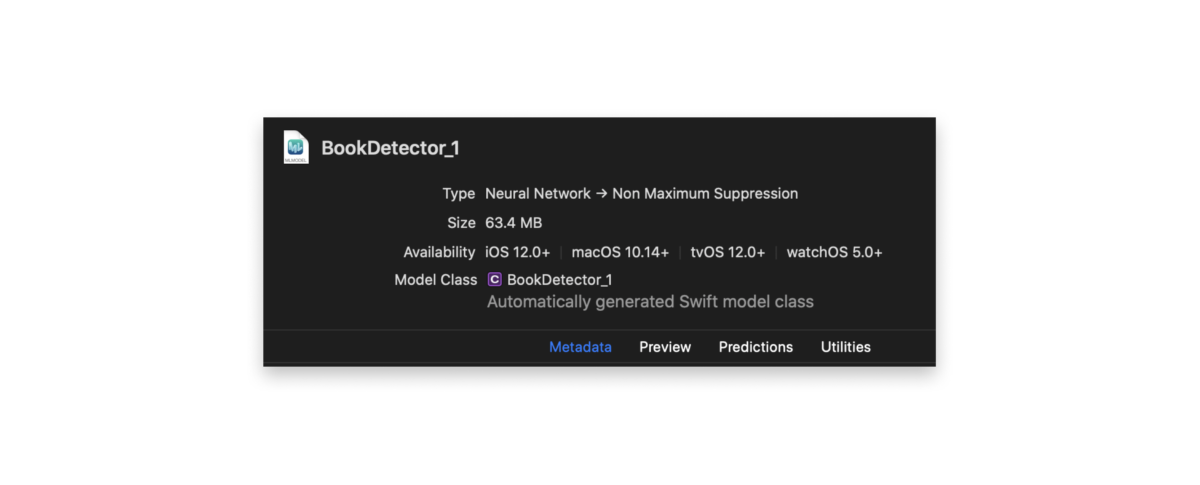
Running the model was also fairly straightforward. Xcode automatically generates Swift types for any .mlmodel file that gets added to the project. In our example, our model was called BookDetector_1(). We simply initialized it using the generated method, set the input image (more on that later), generated a VNCoreMLRequest, executed the request, and checked the completion block to ensure that we received an array of VNRecognizedObjectObservations (which provide information about the identified bounding boxes) back. About 25 lines of code to run a real-time computer vision network on a live camera feed: not bad!
// ARSessionDelegate method gets called for every ARFrame. We can run our ML model here.
func session(_ session: ARSession, didUpdate frame: ARFrame) {
guard
let bookDetectorModel = bookDetectorModel,
let model = try? VNCoreMLModel(for: bookDetectorModel.model)
else {
return
}
let pixelBuffer = frame.capturedImage
let input = BookDetector_1Input(image: pixelBuffer)
do {
let request = VNCoreMLRequest(model: model) { (request, error) in
guard
let results = request.results,
!results.isEmpty,
let recognizedObjectObservation = results as? [VNRecognizedObjectObservation],
let first = recognizedObjectObservation.first
else {
self.parent.boundingBox = nil
return
}
print("\(first.boundingBox)")
self.parent.boundingBox = first.boundingBox
}
model.featureProvider = input
let handler = VNImageRequestHandler(cvPixelBuffer: pixelBuffer, orientation: CGImagePropertyOrientation.right, options: [:])
try handler.perform([request])
} catch {
print(error)
}
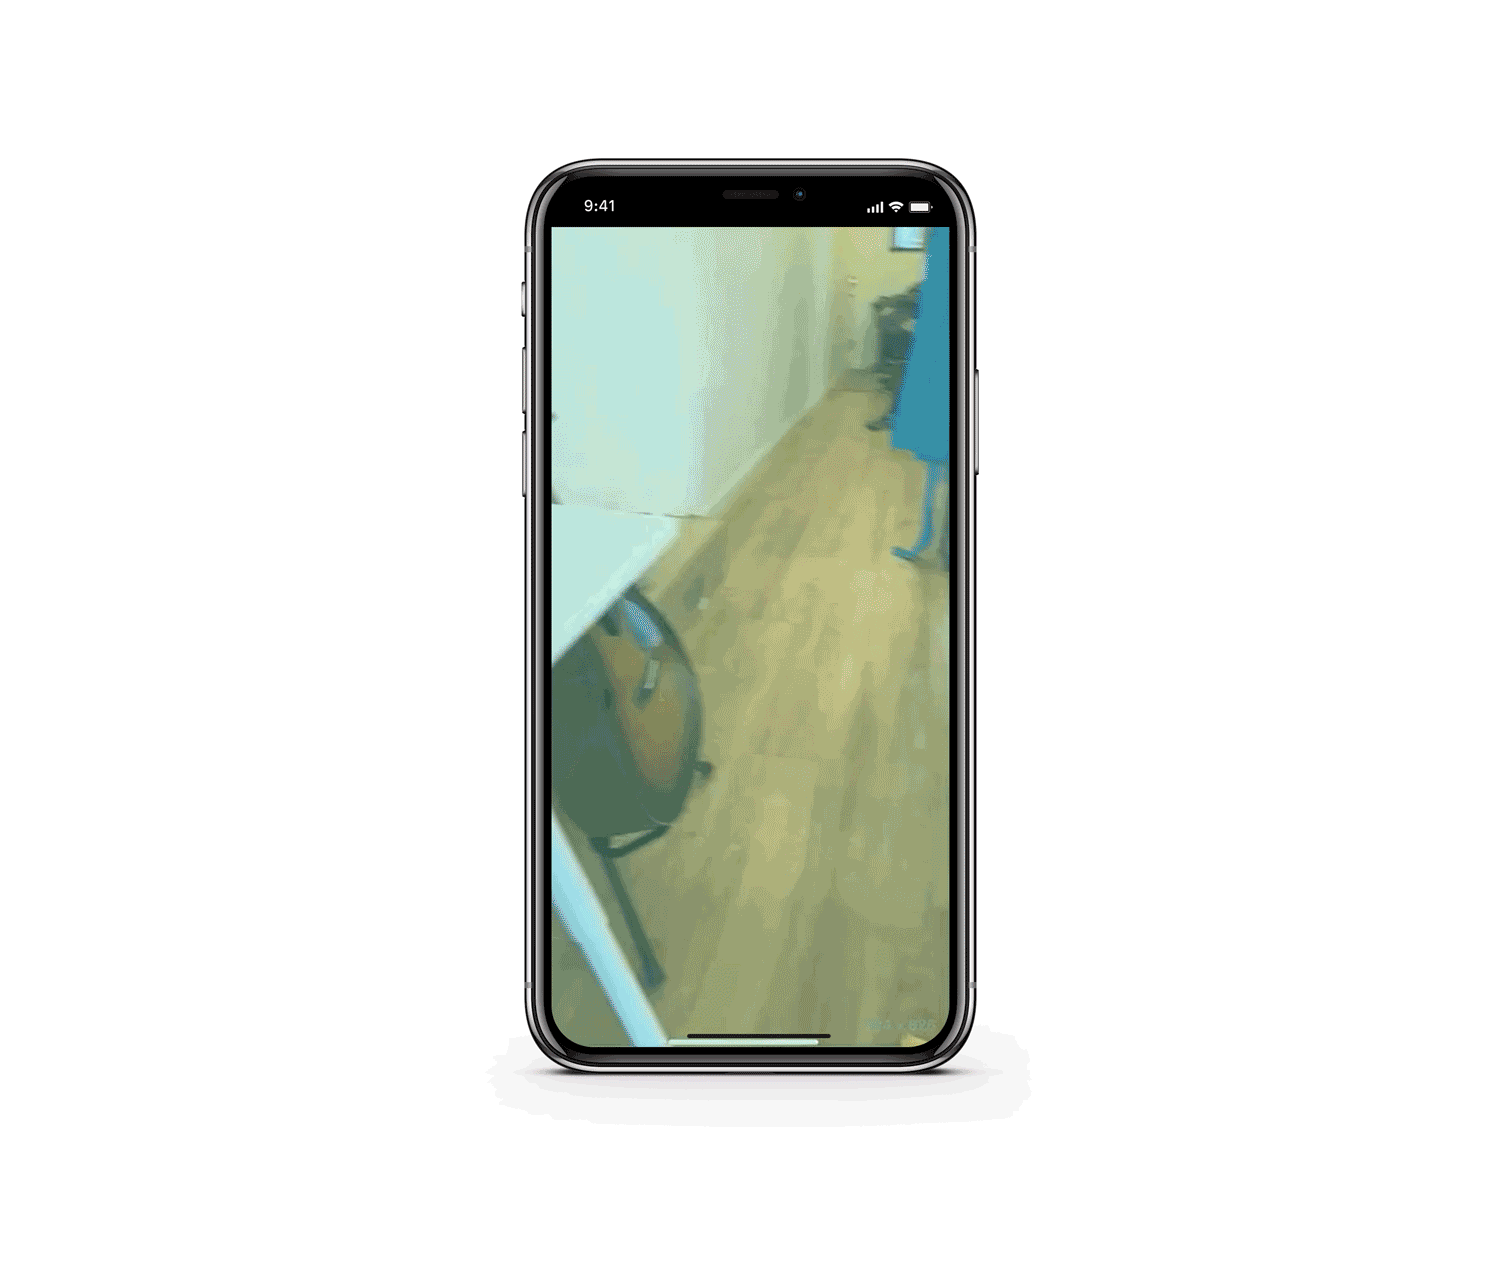
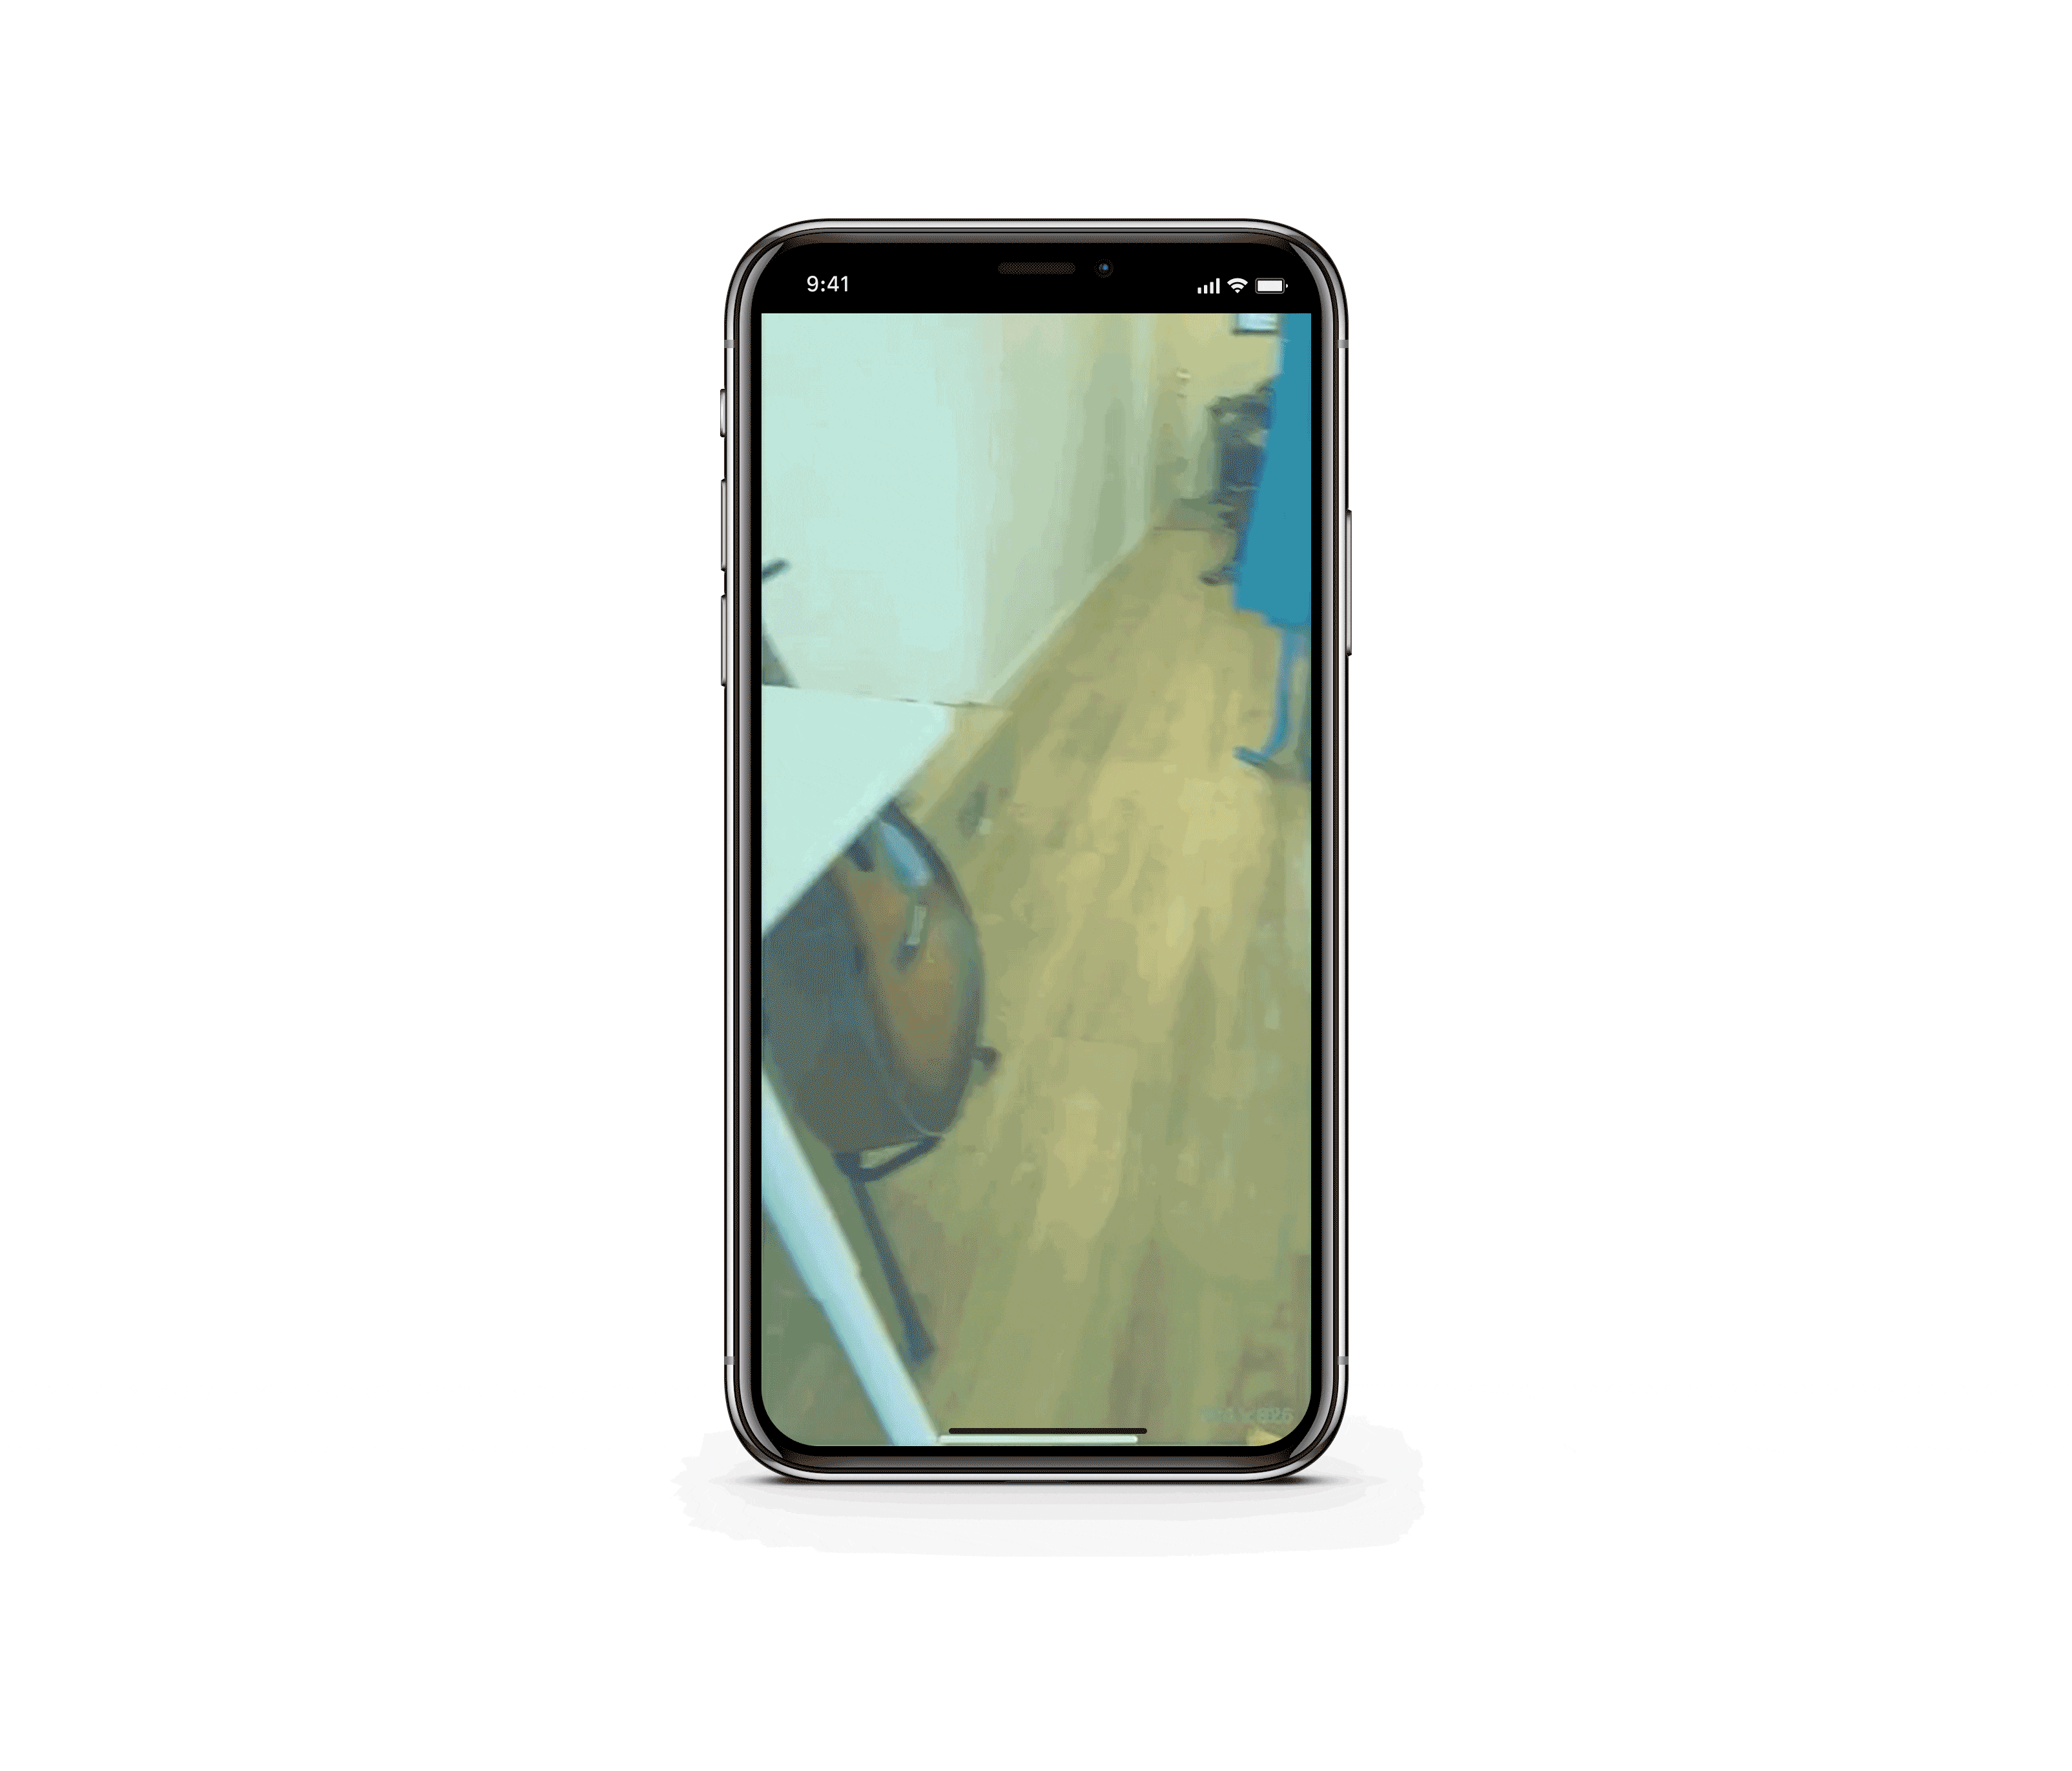
}We placed a red box over the bounding box to make sure our model was working correctly. One slightly tricky aspect to this was that the coordinate system returned from Vision was different than SwiftUI’s coordinate system (normalized and the y-axis was flipped), but some simple transformations did the trick. Since it’s such a visual app, it was easy to verify we got it right.
In Conclusion
Now, we’re able to find our book within our 2D video feed, using a custom Core ML computer vision model, and we verified that the prediction seems to be working correctly.
Come back next week for part two of this series: we’ll take that 2D object detection, and try and put it in 3D space, and maybe even animate it.
Tags:

David Sklenar (he/him)
Senior Developer
David is a software developer with over 10 years of experience. He’s spent most of that time developing iOS apps (most recently at Nike) and has used technology to solve problems in poetry publishing, medieval architectural history, cardiac health, and digital storytelling. More recently, he’s become interested in machine learning and its applications and implementation. He most enjoys the collaborative and social nature of software development and the endless opportunities for learning.
Lemon Garrett (they/them/she/her)
Developer, Substantial
A bit of a renaissance person, Lemon spent eight years as a traditional artist before eventually transitioning into a career as a software engineer, and found their way to Substantial in October 2019. As a full-stack developer, Lemon is a steadfast accessibility advocate and a zealous promoter of diversifying the tech industry in pursuit of creating and maintaining a more inclusive, supportive environment. Passionate about leveraging their knowledge in order to help make web and mobile apps universally accessible, Lemon is constantly seeking new, straightforward ways to integrate accessibility best practices into their teams’ workflows and approach to development.